Favorite Tools for Student-Centered Learning
- kristen1879
- Sep 24, 2020
- 6 min read
Updated: Nov 7, 2020

With schools transitioning from brick and mortar learning to virtual learning, teachers have carried the load. From implementing more technology use and using the online platforms, both teachers have been overwhelmed with a steep learning curve given that even from class to class platforms and tools may differ!
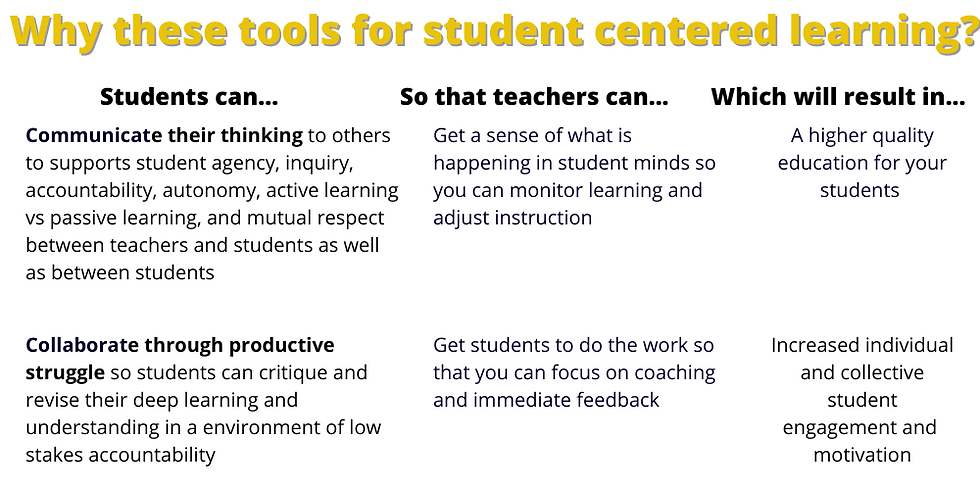
This transformation is also faced with the idea that virtual teaching is “not enough” - not enough time in the day, not enough face to face with students, not enough learning. To combat this, teachers should center learning on their students - as doing so will help address the amount of busy work to fill hours, lack of clarity about what students are doing with the learning activities, and the literal amount of time teachers spend planning for online learning.
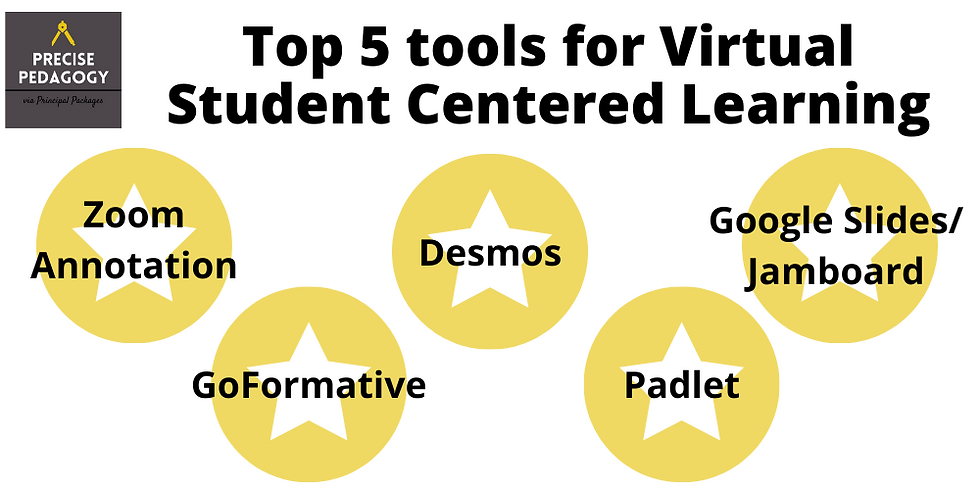
What's so great about these 5 tools below is that they can both be used in synchronous and asynchronous time - resulting in less platforms that you can use with your students. Below you’ll find my favorite tools to empower both students and teachers to do what they are there for: learning through thinking and thinking about learning, respectfully.


Top Five tools
Google Slides/Jamboard

Google Slides & Jamboard that allows teachers to interact with students and students to interact with each other on a digital whiteboard or bulletin board. A class can collaborate on a single Google Jamboard or Slide deck by addition thoughts, additional notes, or images. Teachers can use the “magic” highlighter tool (that makes a temporary highlight on the board and then fades away.) You can even import PDFs to make a fillable worksheet online, and assign each student a page/slide to complete on their own. Either can be used for demonstrations, live notetaking, and crating math representations, for example.
💻 Logistics:
Students don’t need to sign in. Just share the link to the Slides or Jamboard with students. One drawback is that without student sign-in you don’t know who wrote what.
🆓 Price:
Totally free. If you have a Google account, you have Google Slides and Google Jamboard. If your Google account is managed by your district, you may have to ask your administrator to activate Jamboard, as it is a newer product.
⚙ Tech Skills:
No need to download anything else! To access Jamboard, simply sign into your Google drive, select the "+" icon and click "More" at the bottom, then down to click "Google Jamboard" or "Google Slides." You can import anything into Google Slides or Jamboard. It’ll be saved automatically to your Google account.
🧠 Flexibility:
Great ideas for using Google Slides interactively with students. Here's a how to make a Choice Story using Google Slides and additional Google Slides templates from ditchthattextbook. While all of these can also be used in Jamboard, Jamboard has additional presentation features that can both teachers and students can use, such as:
Draw: Draw with a finger or stylus on the screen.
Handwriting recognition: This tool uses your writing and converts it into printed text.
Shape recognition: This tools takes your drawing and turns it into a shape. You can even connect shaped by drawing a line between shapes.
Autodraw: This creates an image from your drawings.
Laser pointer: With this feature, your finger or stylus temporarily highlights items on the board to focus attention on something important.
Zoom Annotation

Zoom allows you and your students to annotate over whatever you are sharing on your screen. You can see the annotation feature in your Zoom toolbar when you are screen sharing. Both the Zoom host and Zoom participants have this feature. You can even save the annotations!
💻 Logistics:
Anyone in your Zoom call can use these features. No need for students to sign in because they enter their names when they enter Zoom.
🆓 Price:
If you use Zoom, you already have these features.
⚙ Tech Skills:
Just turn these features on or off. No need to download anything else! The controls are really easy to use and self-explanatory!
As the Zoom host, you control annotation settings for your Zoom participants.
Enable/Disable Attendee Annotation: Start or stop annotation from within the call. If someone is not using this tool appropriately, you can adjust this immediately.
Show/Hide Names of Annotators: This helps you keep track of what is annotating what. When you hover over an annotation, you can see which participant created that annotation.
🧠 Flexibility:
Use these to draw attention to the information you want them to focus on or get their ideas on your screen!
Padlet

You can create 8 different layouts of a Padlet board - columns, a feed (like a chat), or an open grid, shelf, backchannel, map, or timeline, each with the option of a background color, picture, or graphic organizer like a KWL chart! Students can add to the conversation with text, pictures, video, files, links, GIFs, and more. Student responses are saved and posted immediately, unless you turn on the feature to moderate posts, which allows teachers and students to comment or like immediately, which support shared sense-making.
💻 Logistics:
With a single link, students can view and write on the Padlet board. While Padlet doesn't require students to log in, turning on the Attribute feature requires anyone who writes to enter their name to see the Padlet. Turning on the Comments feature, allows students to comment on each other's posts to share ideas! You can even have the reactions to be able to see quickly student reactions to posts!
Like: Add a heart to a post.
Vote: Add a thumbs up or thumbs down.
Star: Rate between 1 to 5 stars.
Grade: Assign a grade from 0-100.
🆓 Price:
Currently, the free version includes 3 separate Padlet boards, which CAN be reused over and over. The paid version, at $8.25 a month, includes an unlimited number of Padlets. There is an option for school-based Padlet accounts with a 30 day trial, which includes student reports and portfolios as well as additional user management and access control.
⚙ Tech Skills:
It's very easy to set up and share with students and others! When you make a board, you can keep it "secret" so that the world can't find it without a direct link. You can choose whether students and/or others can write on the Padlet. Teachers can even export a Padlet as PDF, CSV, Image, or Excel file and share their boards with other teachers so they can copy and use as a template.
🧠 Flexibility:
Use Padlet to help you identify what students know about a topic or provide a set of resources they should read, watch, listen, or otherwise interact with. Students can use the drawing tool to show their thinking, especially in math and science. Students can submit their work for feedback from classmates before they submit to the teacher, so they can see comments and suggestions.
GoFormative

GoFormative is one of the most versatile tools available to teachers out there right now. Most of the features are available on the free version. In addition to the GoFormative platform, again, lots of teachers create and share their work. You can include videos and websites inside of a GoFormative and have students interact with media as they are answering questions. You can even use the “enhance a PDF/Doc feature” to upload worksheets or other materials you already have for students to complete. What makes this #3 is that you can see group and individual student work in real-time and give them feedback in real time, which is especially handy during live sessions. The grading feature is superb and even allows you to tag standards.
💻 Logistics:
Students simply enter their name when they click on the link you share. No sign-in required! This also links to Google Classroom if you use that.
🆓 Price:
The free version has no less than The Premium version is $12 a month per year and includes
⚙ Tech Skills:
From multiple choice to Show Your Work (drawing), Drag and Drop, Audio Recording, Graphing, Essay, Math Typing, and Resequence, these are simple to create and for students to use.
🧠 Flexibility:
You can use GoFormative for any subject, live or self-paced.
Desmos

For math teachers in particular, the Desmos Activity Builder is awesome. With each activity, it works similar to a powerpoint or Google Slides but more interactive within each screen. Similar to GoFormative, you can see student work immediately and students can create and complete graphs, tables, or card sorts within a slide that can also include media (texts, images, etc.) or an opportunity to sketch their thinking or answer questions with choice and checkboxes. With embedded calculators and input boxes, their thinking can even be shared with other students on a single screen.
💻 Logistics:
When you share the link, students enter their name which shows up on your screen.
🆓 Price:
Totally free. Period.
⚙ Tech Skills:
Though it depends on the level of the math content, teachers can easily copy and paste from shared resources of others that have figured it out!
🧠 Flexibility:
One drawback is that once students start working, you can’t change it unless you create another link for students to use.


Improving your reading efficiency often starts with knowing your current pace. A ReadingSpeedTest online can quickly measure your average words-per-minute (WPM) and comprehension. This baseline helps you track progress as you work on reading faster and more effectively.